2

Crochet Pusheen with Donut

When you get a note from your girl like this, you have to do something, don’t you? 😉

IMG_7881

So I did google as instructed by my daughter, and made her this:

IMG_8396

But I was not happy with the body (not chubby enough), so I did another one:

Here’s how I did mine:

Body:

R1: 6 sc in magic ring. – 6 sc.
R2: 2 sc in each sc around. – 12 sc.
R3: *sc 1, 2 sc in next sc*, rep 6 times. – 18 sc.
R4: * sc in first 2 sc, 2 sc in next sc*, rep 6 times. – 24 sc.
R5: * sc in first 3 sc, 2 sc in next sc*, rep 6 times. – 30 sc.
R6: *sc in first 4 sc, 2 sc in next sc*, rep 6 times. – 36 sc.
R7: *sc in first 5 sc, 2 sc in next sc*, rep 6 times. – 42 sc.
R8: *sc in first 6 sc, 2 sc in next sc*, rep 6 times. – 48 sc.
R9-14: sc in each sc around. – 48 sc.
R15: sc in first 46 sc, sc2tog. – 47 sc.
R16: sc in first 45sc, sc2tog. – 46 sc.
R17: sc in first 44 sc, sc2tog. – 45 sc.
R18: sc in first 43 sc, sc2tog. – 44 sc.
R19: sc2tog, sc in first 40 sc, sc2tog. – 42 sc.
R20: sc2tog, sc in first 38 sc, sc2tog. – 40 sc.
R21: sc2tog, sc in first 36 sc, sc2tog. – 38 sc.
R22: sc2tog, sc in first 34 sc, sc2tog. – 36 sc.
R23: sc2tog, sc in first 32 sc, sc2tog. – 34 sc.
R24: sc2tog, sc in first 30 sc, sc2tog. – 32 sc.
R25: sc2tog, sc in first 28 sc, sc2tog. – 30 sc.
R26: sc2tog, sc in first 26 sc, sc2tog. – 28 sc.

Now you will be making the ear shape (dividing the 28 stitches into 14 stitches in the front and 14 in the back)
R27: *sl st, sc, hdc, dc, hdc, sc, sl st*, rep 4 times. – 28 sc.
Fasten off leaving a long tail for sewing. Stuff, and then sew to close the opening and weave in ends.

Tail:

Using black yarn,

R1: 6 sc in magic ring. – 6 sc.

R2-3: sc in each sc around. – 6 sc.

Change to grey yarn,

R4-R6: sc in each sc around. – 6 sc.

Change to black yarn,

R7-R8: sc in each sc around. – 6 sc.

Change to grey yarn,

R9-R10: sc in each sc around. – 6 sc.

Change to black yarn,

R11-R12: sc in each sc around. – 6 sc.

Fasten off, leaving a tail for sewing onto the back of the pusheen body.

Feet (top ones holding donut):

R1: 4 sc in magic ring. – 4 sc.

Fasten off, leaving a tail for sewing onto the donut and then onto pusheen body.

Feet (bottom ones):

R1: 6 sc in magic ring. – 6 sc.

R2: sc in each sc around. – 6 sc.

Fasten off, leaving a tail for sewing onto the front bottom of pusheen body.

Donut: I used the pattern from this blog post (click here).

Add eyes, nose/mouth, whiskers.  I also used black felt to add two black stripes on the back of the pusheen.  Let me know what you think about this pattern after trying out. 🙂

0

Crochet Orange Wedding Couple

I made this for my newly wed coworker who calls herself “Big Orange”.

IMG_8227

For the bride, I used worsted orange yarn and a 4 mm crochet hook, following the pattern (Click here) for “26 Row Sphere” and mine measured 3.5″ in diameter.

For the groom, I made up my own pattern:
R1: 6 sc in magic ring. – 6 sc.
R2: 2 sc in each sc around. – 12 sc.
R3: *sc 1, 2 sc in next sc*, rep 6 times. – 18 sc.
R4: * sc in first 2 sc, 2 sc in next sc*, rep 6 times. – 24 sc.
R5: * sc in first 3 sc, 2 sc in next sc*, rep 6 times. – 30 sc.
R6: *sc in first 4 sc, 2 sc in next sc*, rep 6 times. – 36 sc.
R7: *sc in first 5 sc, 2 sc in next sc*, rep 6 times. – 42 sc.
R8: *sc in first 6 sc, 2 sc in next sc*, rep 6 times. – 48 sc.
R9: *sc in first 7 sc, 2 sc in next sc*, rep 6 times. – 54 sc.
R10: *sc in first 8 sc, 2 sc in next sc*, rep 6 times. – 60 sc.
R11 – R20: sc in each sc around. – 60 sc.
R21: *sc in first 8 sc, sc2tog*, rep 6 times. – 54 sc.
R22: *sc in first 7 sc, sc2tog*, rep 6 times. – 48 sc.
R23: *sc in first 6 sc, sc2tog*, rep 6 times. – 42 sc.
R24: *sc in first 5 sc, sc2tog*, rep 6 times. – 36 sc.
R25: *sc in first 4 sc, sc2tog*, rep 6 times. – 30 sc.
R26: *sc in first 3 sc, sc2tog*, rep 6 times. – 24 sc.
R27: *sc in first 2 sc, sc2tog*, rep 6 times. – 18 sc.
R28: *sc 1, sc2tog*, rep 6 times. – 12 sc.
R29: sc2tog 6 times. – 6 sc.
Fasten off and finish stuffing.

For the stem, I chained 7 and single crocheted down in 6 chains. Fasten off.

I made leaves (click here for pattern) for the groom and 1 bow (click here for pattern) and 1 leaf for the bride.

Last but not least, add facial features and accessories (e.g. veil) and you are done! 🙂

0

Crochet Tiger – Zodiac Animal Series

After watching the 2018 Winter Olympics in PyeongChang, my son fell in love with the mascot Soohorang which is a white tiger.  Since he’s born in the year of tiger, I decided to make him a little white tiger.  After looking into different patterns, I made up mine and here it comes!  Let me know how many of you will be interested in making one, then I will decide if I will bother to write up the pattern. 🙂

IMG_7359

0

Crochet Mouse – Zodiac Animal Series

My daughter was born in the year of rat/mouse, and she always feels unpleasant about that although she loves “Tom and Jerry”.  I’ve been thinking of making a cute one for her to change her “stereotype”.  And here it comes:

IMG_7434

I was told that it looks similar to Totoro (from an animated Japanese tale).  Anyway, here’s the pattern that I made up and hope you will like it.  I used grey yarn for the body and white for the tummy, black for face features.

R1: 6 sc in magic ring. – 6 sc.
R2: 2 sc in each sc around. – 12 sc.
R3: *sc 1, 2 sc in next sc*, rep 6 times. – 18 sc.
R4: * sc in first 2 sc, 2 sc in next sc*, rep 6 times. – 24 sc.
R5: * sc in first 3 sc, 2 sc in next sc*, rep 6 times. – 30 sc.
R6: *sc in first 4 sc, 2 sc in next sc*, rep 6 times. – 36 sc.
R7: *sc in first 5 sc, 2 sc in next sc*, rep 6 times. – 42 sc.
R8: *sc in first 6 sc, 2 sc in next sc*, rep 6 times. – 48 sc.
R9: *sc in first 7 sc, 2 sc in next sc*, rep 6 times. – 54 sc.
R10-R20: sc in each sc around. – 54 sc.
R21: *sc in first sc, 2 sc in next sc*, rep 18 times. – 36 sc.
R22 – R24: sc in each sc around. – 36 sc.
R25: *sc in first 4 sc, sc2tog*, rep 6 times. – 30 sc.
R26 – R27: sc in each sc around. – 30 sc.
R28: *sc in first 3 sc, sc2tog*, rep 6 times. – 24 sc.
R29: *sc in first 2 sc, sc2tog*, rep 6 times. – 18 sc.
R30: *sc 1, sc2tog*, rep 6 times. – 12 sc.
R31: *sc in first 2 sc, sc2tog *, rep 3 times. – 9 sc.
R32: *sc 1, sc2tog *, rep 3 times. – 6 sc.
Fasten off and finish stuffing.

You are now done with the body of the mouse.  For the tummy, I used white yarn and follow the body pattern from R1 to R5, fasten off and sew onto body.

For the ears, make 2.

R1: 6 sc in magic ring. – 6 sc.
R2: 2 sc in each sc around. – 12 sc.
R3: * sc 2, 2 sc in next sc*, rep 5 times.. – 15 sc.
R4 – R5: sc in each sc around. – 15 sc.

Fold the circle in half and sew ears onto body.  Add eyes, nose, whiskers.  Ta-da, you are done!  Hope you’ve had fun making a cute little mouse.  Feel free to be creative using different color combination.


0

Knitted Seed/Moss Stitch Beanie

It’s been a cold winter and I would like something warming my ears when I am outside, even though I never like hats.  And I found this pattern from Lady by the Bay that I fell in love with, even though I’ve never knitted a hat before.  I couldn’t find the yarn that was used in the pattern, so I got the Lion Brand Wool-Ease Thick & Quick Yarn (Color: Wheat) instead.  I will show you what I did as a first timer knitting a hat while following the pattern.

When I read the materials used “US 11 – 8.00 mm 16″ circular needle or dpns”, I already got stuck.  I don’t have the 16″ circular needle (my shortest circular needle is longer than 16″), but what does “dpns” mean?  So I searched on YouTube and found the answer.  “dpns” stands for double pointed needles.  Then I remember I’ve seen my mom using 4 short needles to work on sleeves when I was a kid.  But I don’t remember how my mom manage the 4 needles to get them work.  I found a video (click here) from Sheep and Stitch with clear demo and instructions for beginners like me .  After watching the video, I could start my project.

I use 3 x 8.00mm double pointed needles using long tail cast for 44 stitches.  It seems small, but the finished project does stretch to 22″, big enough for my head.

The pattern works from the bottom of the hat all the way up.  First I will be working on the ribbing.  The ribbing pattern is K2, P2, meaning you knit 2 stitches and then purl 2 stitches, repeating this till the end of your row.  I have reached 2″ when I finished 9 rows (instead of 11 rows as stated in the pattern).

Then I switched to 9.00 mm double pointed needles for the seed/moss stitches as instructed in the pattern.  The 1st row of seed/moss stitches is easy until you reach the last stitch.  The pattern said “K1, P1 until last st, purl front and back of last st. You should now have 45 sts on your needle.”.  So I did K1, P1 from beginning till my 43rd stitch (ending with K1), then I have to purl front and back for the last stitch.  I again searched on YouTube since I don’t know how to do that, and found this video (click here) from Gingerly4it which is pretty helpful.  So I did the purl front and back and got 45 stitches for my 1st row of seed/moss stitches.

For the rest of the rows to do the hat, you pretty much just knit on the purl stitches, and purl on the knit stitches, if you know how to tell the difference between knit and purl stitches.  A video (click here) from B. Hook Crochet could be helpful when you work on this project, although her ribbing and design are different.  But you will get a rough idea how to handle yours if this is your first time like me (see her written pattern here).  I also find her way of finishing the project easier, so I adopted her way in my project which will be mentioned later in this post.  I did 23 rows of seed/moss stitches when I got my hat measuring 9.5 ” including my 2″ ribbing.

For the decreasing, I followed the pattern and did the “Rnd 1” & “Rnd 2” twice (after the first time, I got 23 stitches left, and then 11 stitches after the 2nd time).  Then I did the draw string as instructed in the previously mentioned video (click here) from B. Hook Crochet to close my hat (instead of continuing decreasing).  I found this way of “binding off” easier.  So here’s what I did (without a pom pom):


In the end I decided to give that to my BFF for her birthday.  But I wanted one for myself too, so I tried a different yarn and made another one.  This time I tried the Bernat Softee Chunky Yarn (Color: Grey Ragg).  Interestingly, both yarns are “Super Builky 6″, but the Bernat one is slightly thinner.  Since the Lion Brand one got 20% wool while the Bernat one is 100% acrylic, I also found the Lion Brand one is cozier for beanies.  I pretty much did everything the same except I had to do 34 rows of the seed/moss stitches to make it 9.5”.  This is how it looks like (more slouchy than my first one for some reason):

Hope you find this helpful learning how to make a knitted beanie!  Happy knitting/crocheting!

0

Crochet Tunisian Ear Warmer – Yarn Club Fundraising Project

It’s been a while since my last post, and I have been feeling guilty for slacking off.  Finally I’ve picked up the crochet hooks again and made the Tunisian Ear Warmer (Click here for the free pattern) for the Yarn Club Fundraising.  I used Bernat Baby Big Ball Sport Yarn (Color: Blossom) and a 4 mm crochet hook.  I followed the free pattern but since I am using a different yarn and a different size hook, I made more than 55 rows as stated in the  pattern.  I started with chaining 17 (same as the pattern), and crocheted until it measures 20″ long.  I made this for a 9-year old, but you can measure the head size and minus 1″ in order to get a better fit (since the yarn will stretch).  I like the Tunisian stitches very much and this is what it looks as when completed!  Hope you will like it too!

1

CLICK for Babies 2017 – Crochet Purple Baby Hats

I did this once three years ago, and didn’t get time to do it again in the past two years.

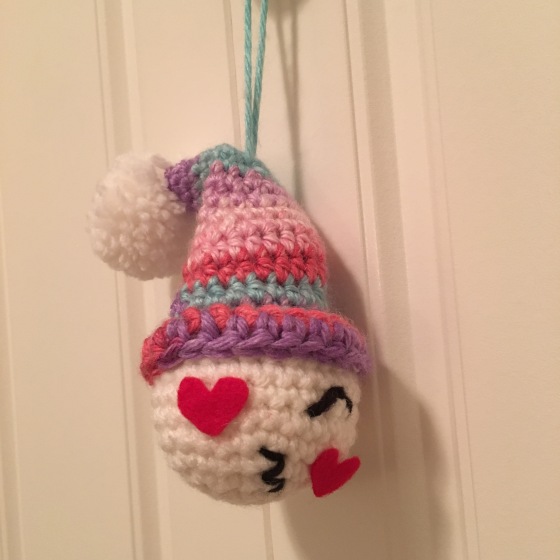
This year the knitting club at work will be participating, so I am in!  Coworker found this pattern from Allicrafts (click here) and I love it.  I made 2 trying out the pattern differently, using Caron Simply Soft.

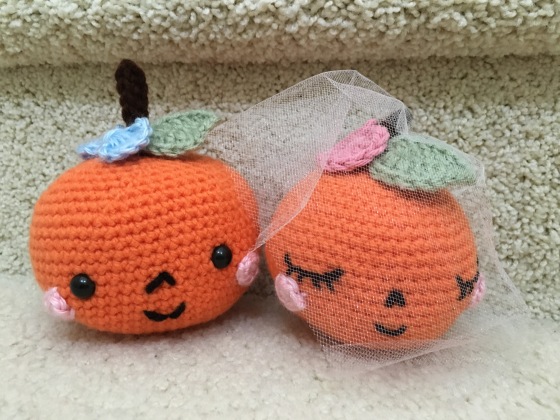
First one, I used 5mm crochet hook, and follow the pattern until round 4.  I did purple and pink yarn alternatively.

Round 1 (use purple yarn): Make a magic ring, ch 3 (as part of the first cluster), then yarn over (yo), insert the hook into the magic ring, yarn over, draw the yarn through the stitch, yarn over, draw the yarn through 2 loops on the hook.  Two loops remain on the hook. One half-closed double crochet is complete. A half-closed stitch is one that’s only worked partway, and then finished at the end of the combination.  Repeat the preceding step once.  You should end up with 3 loops on the hook. Yarn over and draw the yarn through all 3 loops on the hook, chain 2.  The first cluster is completed.  *yarn over (yo), insert the hook into the magic ring, yarn over, draw the yarn through the stitch, yarn over, draw the yarn through 2 loops on the hook.  Two loops remain on the hook. One half-closed double crochet is complete. A half-closed stitch is one that’s only worked partway, and then finished at the end of the combination.  Repeat the preceding step twice.  You should end up with 4 loops on the hook, chain 2.* Now you finished the 2nd cluster.  Repeat from * 3 times.  Pull magic ring tight.  sl st to top ch of ch 3, sl st in next st, sl st in ch-2 space.  (5 clusters)

Round 2 (change to pink yarn): This round you will make 2 clusters in each ch-2 space, making 10 clusters.  Ch 3 (as part of the first cluster), then yarn over (yo), insert the hook into the ch-2 space, yarn over, draw the yarn through the stitch, yarn over, draw the yarn through 2 loops on the hook.  Two loops remain on the hook. One half-closed double crochet is complete. A half-closed stitch is one that’s only worked partway, and then finished at the end of the combination.  Repeat the preceding step once.  You should end up with 3 loops on the hook. Yarn over and draw the yarn through all 3 loops on the hook, chain 2.  The first cluster is completed..  In the same ch-2 space, *yarn over (yo), insert the hook into the magic ring, yarn over, draw the yarn through the stitch, yarn over, draw the yarn through 2 loops on the hook.  Two loops remain on the hook. One half-closed double crochet is complete. A half-closed stitch is one that’s only worked partway, and then finished at the end of the combination.  Repeat the preceding step twice.  You should end up with 4 loops on the hook, chain 2.* Now you finished the 2nd cluster.  Repeat from * twice in each ch-2 space.  sl st to top ch of ch 3, sl st in next st, sl st in ch-2 space.  (10 clusters)

Round 3 (purple):  This round you will make 2 clusters in first ch-2 space, then 1 cluster in next ch-2 space alternatively, making 15 clusters.  Ch 3 (as part of the first cluster), then yarn over (yo), insert the hook into the ch-2 space, yarn over, draw the yarn through the stitch, yarn over, draw the yarn through 2 loops on the hook.  Two loops remain on the hook. One half-closed double crochet is complete. A half-closed stitch is one that’s only worked partway, and then finished at the end of the combination.  Repeat the preceding step once.  You should end up with 3 loops on the hook. Yarn over and draw the yarn through all 3 loops on the hook, chain 2.  The first cluster is completed..  In the same ch-2 space, *yarn over (yo), insert the hook into the magic ring, yarn over, draw the yarn through the stitch, yarn over, draw the yarn through 2 loops on the hook.  Two loops remain on the hook. One half-closed double crochet is complete. A half-closed stitch is one that’s only worked partway, and then finished at the end of the combination.  Repeat the preceding step twice.  You should end up with 4 loops on the hook, chain 2.* Now you finished the 2nd cluster.  The next ch-2 space you will only make 1 cluster, so repeat from * once.  Then repeat from * twice in next ch-2 space, then once until the end. sl st to top ch of ch 3, sl st in next st, sl st in ch-2 space.  (15 clusters)

Round 4 (pink): This round you will make 1 cluster in each ch-2 space, making 15 clusters.  Ch 3 (as part of the first cluster), then yarn over (yo), insert the hook into the ch-2 space, yarn over, draw the yarn through the stitch, yarn over, draw the yarn through 2 loops on the hook.  Two loops remain on the hook. One half-closed double crochet is complete. A half-closed stitch is one that’s only worked partway, and then finished at the end of the combination.  Repeat the preceding step once.  You should end up with 3 loops on the hook. Yarn over and draw the yarn through all 3 loops on the hook, chain 2.  The first cluster is completed..  In the next ch-2 space, *yarn over (yo), insert the hook into the magic ring, yarn over, draw the yarn through the stitch, yarn over, draw the yarn through 2 loops on the hook.  Two loops remain on the hook. One half-closed double crochet is complete. A half-closed stitch is one that’s only worked partway, and then finished at the end of the combination.  Repeat the preceding step twice.  You should end up with 4 loops on the hook, chain 2.* Now you finished the 2nd cluster.  Repeat from * in each ch-2 space till the end.  sl st to top ch of ch 3, sl st in next st, sl st in ch-2 space.  (15 clusters)

Round 5 (purple): This round you will make 2 clusters in first ch-2 space, then 1 cluster in next 2 ch-2 space, then repeat the same process, making 20 clusters.  Ch 3 (as part of the first cluster), then yarn over (yo), insert the hook into the ch-2 space, yarn over, draw the yarn through the stitch, yarn over, draw the yarn through 2 loops on the hook.  Two loops remain on the hook. One half-closed double crochet is complete. A half-closed stitch is one that’s only worked partway, and then finished at the end of the combination.  Repeat the preceding step once.  You should end up with 3 loops on the hook. Yarn over and draw the yarn through all 3 loops on the hook, chain 2.  The first cluster is completed..  In the same ch-2 space, *yarn over (yo), insert the hook into the magic ring, yarn over, draw the yarn through the stitch, yarn over, draw the yarn through 2 loops on the hook.  Two loops remain on the hook. One half-closed double crochet is complete. A half-closed stitch is one that’s only worked partway, and then finished at the end of the combination.  Repeat the preceding step twice.  You should end up with 4 loops on the hook, chain 2.* Now you finished the 2nd cluster.  The next 2 ch-2 space you will only make 1 cluster, so repeat from * once.  Then repeat from * twice in next ch-2 space, then once in next 2 ch-2 space until the end. sl st to top ch of ch 3, sl st in next st, sl st in ch-2 space.  (20 clusters)

Round 6 (pink): This round you will make 1 cluster in each ch-2 space, making 20 clusters.  Ch 3 (as part of the first cluster), then yarn over (yo), insert the hook into the ch-2 space, yarn over, draw the yarn through the stitch, yarn over, draw the yarn through 2 loops on the hook.  Two loops remain on the hook. One half-closed double crochet is complete. A half-closed stitch is one that’s only worked partway, and then finished at the end of the combination.  Repeat the preceding step once.  You should end up with 3 loops on the hook. Yarn over and draw the yarn through all 3 loops on the hook, chain 2.  The first cluster is completed..  In the next ch-2 space, *yarn over (yo), insert the hook into the magic ring, yarn over, draw the yarn through the stitch, yarn over, draw the yarn through 2 loops on the hook.  Two loops remain on the hook. One half-closed double crochet is complete. A half-closed stitch is one that’s only worked partway, and then finished at the end of the combination.  Repeat the preceding step twice.  You should end up with 4 loops on the hook, chain 2.* Now you finished the 2nd cluster.  Repeat from * in each ch-2 space till the end.  sl st to top ch of ch 3, sl st in next st, sl st in ch-2 space.  (20 clusters)

Round 7-11 (purple): Loosely sl st around in back loops only. (60 st)

Fasten off and weave in ends.

Then I tried 5.5 mm crochet hook, following the pattern without changing anything, using pink and grey yarn alternatively.  It turned out about the same size as what I did with the purple/pink one.

Which one do you like better, color/pattern wise?  Stay tuned since I will be trying out different patterns when working on this project. 🙂